Tutorial 07 – Mastering Custom Ceiling Design in Coohom

Episodes


Tutorial 07 – Mastering Custom Ceiling Design in Coohom
Khireddine Z | September 30, 2024
0 Likes
0
Ratings
How to design a custom ceiling in Coohom?
When it comes to interior design, ceilings often don’t get the attention they deserve. However, a well-designed ceiling can completely transform a room. In this post, I’ll walk you through creating two custom ceiling designs using Coohom—one for a living room and one for a bedroom. Whether you’re an interior design professional or a student looking to refine your skills, this guide will help you create personalized ceilings that enhance any space.
👉 Sign up for Coohom today for FREE, use the code “zkacademy” to get a 72% discount!
Step 1: Access the Ceiling Editor
To get started, navigate to the Ceiling Editor in Coohom. Whether you're in plan view or 3D view, you can select the ceiling to open this tool. For our living room ceiling, the goal is to integrate hidden lights and track lighting for a modern and sleek look.
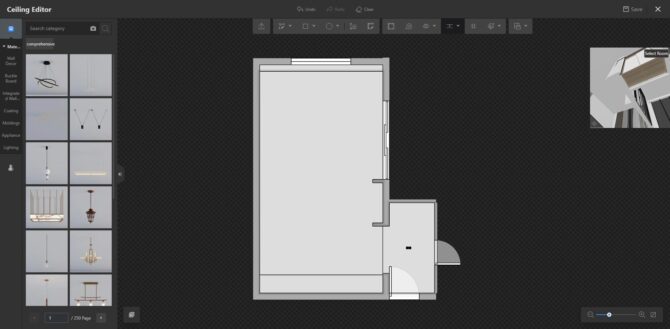
Coohom ceiling editor
Step 2: Add Guidelines and Create the Light Zones
Begin by adding guidelines to position your lighting elements. I left a 20 cm void for the curtain side, while I set a 55 cm offset for the kitchen side. Next, I drew the ceiling using the rectangle and line tools, I drew a rectangle to define where the hidden lights and track lights would be. I set this area to 50 cm using the Offset Tool and removed unnecessary lines.
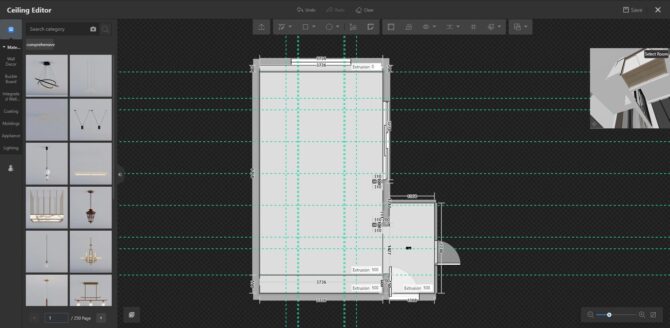
Adding guide lines in Coohom ceiling editor
Step 3: Extrude the Surface
Once the zones are defined, select the surfaces and I extrude them to shape my ceiling. From the 3D view, you can already see how the design is shaping up. For the hidden lights, extrude the inner part by a smaller value, and make sure that the light strip is enabled which will automatically place the hidden lighting in your design.
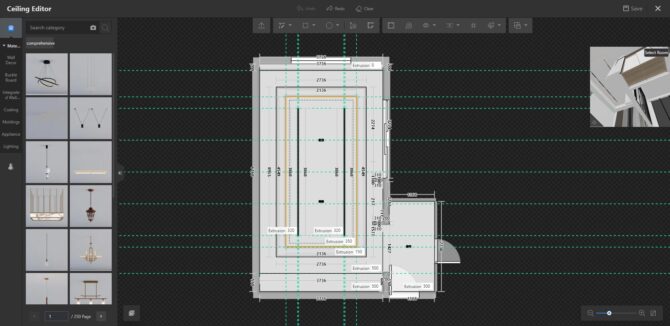
Extruding the surfaces to shape the ceiling in Coohom
Step 4: Fine-Tune Track Lighting
To install track lighting, add guidelines at 35 cm from each side. Draw two rectangles, select both surfaces, and extrude them by -3 cm, as a final step paint the track light parts with a black paint. Adjust the track light model by scaling them to 2.5 cm width and 35 cm length, and ensure equal spacing between the units using the guidelines.
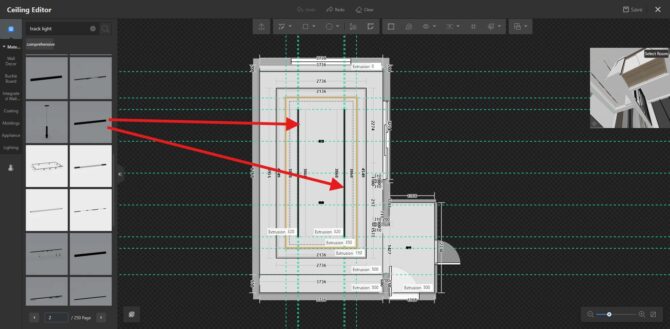
Adding the trach lights in Coohom.
Pro Tip:
Be sure to adjust the extruded surfaces to the desired depth.
Conclusion
Designing custom ceilings in Coohom opens up endless possibilities for personalizing spaces. Whether you're integrating hidden lights or leveraging built-in ceiling models, these techniques will enhance your interior projects. In the next tutorial we will make the final adjustments on materials before moving to the 3d rendering.
Thank you for following along! Be sure to subscribe to my YouTube channel for more tutorials and sign up for my newsletter to stay updated on the latest design tips. Happy designing!
Written by Khireddine Z
Comments
Tutorial 06 – Bathroom Design in Coohom
Pingback:
Comments are closed.