Tutorial 06 – Bathroom Design in Coohom

Related


Tutorial 06 – Bathroom Design in Coohom
Khireddine Z | September 30, 2024
0 Likes
0
Ratings
How to Design a Modern Bathroom from Scratch
Designing a bathroom that combines functionality with aesthetics can be a rewarding challenge. Whether you’re a professional interior designer or a student learning the ropes, mastering bathroom layouts and finishes is essential. In this blog, I’ll walk you through the complete process of designing a bathroom from scratch. By the end of this post, you'll be equipped to create a fully customized bathroom that meets both practical needs and design aspirations.
👉 Sign up for Coohom today for FREE, use the code “zkacademy” to get a 72% discount!
Step 1: Plan the Layout
The first step in any bathroom design is laying out the key zones. For this project, we divided the space into three areas:
- Vanity Area: Ideal for your sink and mirror.
- Toilet Zone: A compact and functional space.
- Shower Area: Featuring a niche and custom wall for added style.
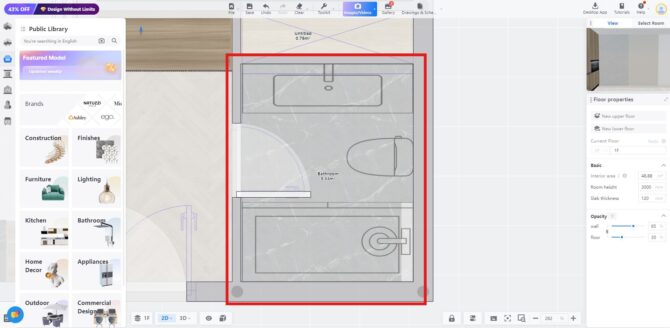
Bathroom Layout , Coohom
After setting up these zones, I hide the layout legend for a cleaner view and headed to the Coohom Public Library to start adding fixtures. When choosing items like vanities and toilets, be mindful of the space constraints to ensure the furniture fits without overcrowding the room. For instance, we picked a compact toilet and rotated it to fit perfectly into our design.
Step 2: Build the Shower Niche and Wall
Now onto the shower area! To add a customized touch, I built a niche and surrounded it with a custom wall for added dimension. In Coohom, this process is simple:
- Go to the Wall Editor and create guides for precise measurements.
- Use the Rectangle Tool to outline the niche and wall sections.
- Extrude the surface by 12 cm for depth.
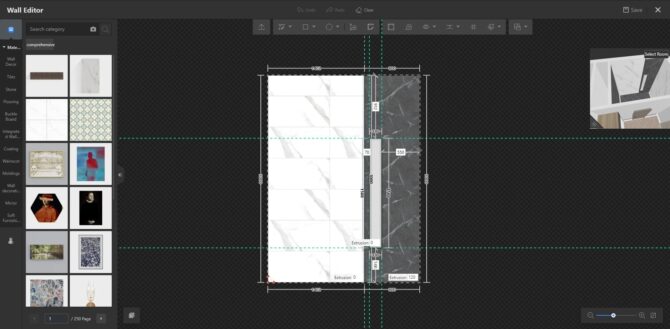
Bathroom wall design , Coohom
Once the structure is ready, we add a glass separation, adjusting its height to 240 cm for a sleeker look.
Step 3: Material Selection and Application
Materials are what bring a bathroom design to life, giving it character and warmth. For this project, I applied marble as the primary material, creating a luxurious yet modern vibe. Here's how I did it:
- I used Coohom’s Material Brush to pick a marble texture from the kitchen countertop and applied it across the bathroom’s floor, niche, and even the vanity wall.
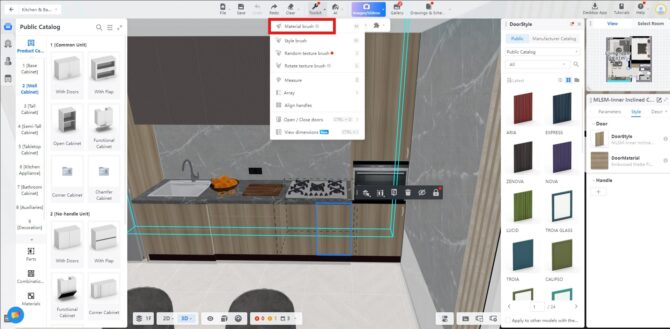
Brush tool , Coohom
- For the remaining walls, I chose a contrasting black-and-white marble tile, ensuring that the size and orientation were adjusted correctly in the Wall Editor.
A key tip here is to make sure you rotate the tile textures and adjust their size to maintain consistency in the design. A map size of 45 x 90 cm worked perfectly for this project.
Step 4: Final Touches and Accessories
Before wrapping up, don’t forget the final accessories! Shower fixtures, towel bars, and lighting fixtures can make all the difference in a bathroom. I added these touches to bring functionality and aesthetic harmony to the space.
Conclusion
And that’s a wrap on designing a bathroom from scratch! This step-by-step process will help you create customized bathrooms that are both stylish and functional. Don’t forget to experiment with textures and materials to elevate the look of the space.
in the next video, I will show you how to add a modern ceiling to this studio from scratch. Thank you so much for reading! If you enjoyed this tutorial, be sure to subscribe to my YouTube channel for more design tips and tricks, and sign up for my newsletter to stay updated on all my latest projects. Happy designing!
Written by Khireddine Z
Comments
Tutorial 05 – Designing Custom Walls in Coohom
Pingback:
Comments are closed.