Tutorial 09 – 3D Rendering in Coohom: Camera Placement, Lighting Setup, and Final Settings.

Related


Tutorial 09 – 3D Rendering in Coohom: Camera Placement, Lighting Setup, and Final Settings.
Khireddine Z | September 30, 2024
0 Likes
0
Ratings
Mastering 3D Rendering in Coohom.
Welcome back to the blog! Today, we’re diving into 3D rendering in Coohom, a powerful tool for interior designers. We all know that mastering 3D rendering is essential to showcase your designs. In this post, I’ll guide you through how to use Coohom’s rendering tools, set up your camera, and balance lighting to achieve stunning results.
👉 Sign up for Coohom today with the link below, and use code “zkacademy” to get a 72% discount!
1- Setting Up for Success: Camera and Rendering Basics
Choosing the Right Image Format and Resolution
Coohom offers several options for rendering images, with resolutions ranging from 1K to 8K. For test renders, 1K SD is recommended to save time and resources. Once you're happy with your design, you can switch to higher resolutions like 2K or 4K to produce final, high-quality images.

Render Resolution, Coohom
Coohom also provides presets like indoor daytime and nighttime, which are great for quickly setting up your renders. However, the real magic happens when you customize your settings.
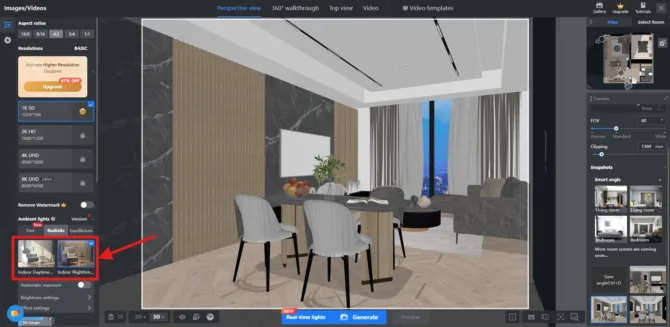
Coohom render day and night presets
Advanced Settings for Better Renders
For optimal results, always check the boxes in the advanced settings. These control important features like noise reduction and light effects, similar to what you might be familiar with from rendering engines like V-Ray or Corona. Checking these settings ensures your renders come out clean and professional.

Advanced setting for the final renders in Coohom
One key tip: leave the last two advanced settings (which increase rendering time) unchecked unless you are doing a final render. This will save you significant rendering time during test phases.
2- Mastering Light: Balancing Natural and Artificial Lighting
If you are not happy with the premade day and night presets of Coohom, you can customize your scenario from the "add lights" tab on the left side. From there, you can control natural and artificial lights such as the sun and the spotlights.
Lighting is the backbone of any great render. In Coohom, you can control the sunlight by adjusting its intensity, height, and direction. For example, positioning the sun to cast soft shadows across your scene can create a beautiful natural lighting effect.
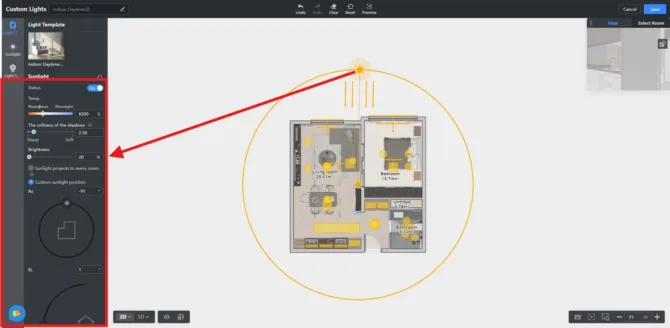
Sunlight settings in Coohom
Adding Artificial Light
Coohom automatically generates lighting based on your design, but manually placing lights gives you much more control. You can adjust the position, brightness, and even the temperature of artificial lights to create a warm or cool atmosphere.
For realistic lighting effects, consider placing rectangular lights or spotlights in strategic locations like the ceiling or behind furniture. This ensures that both natural and artificial light blend seamlessly, enhancing your interior design.
3- Perfecting Your Render: Final Adjustments
Once your camera angle and lighting are set, it’s time for the final render. Opt for a 4K resolution for detailed, high-quality images. Be sure to check the effect settings to reduce noise and enhance the lighting.
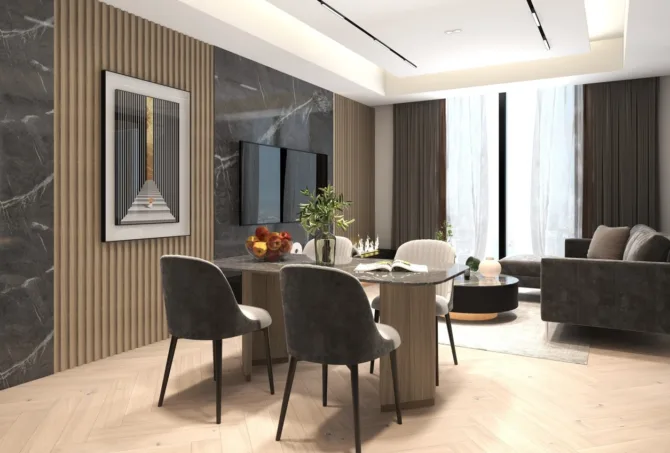
Final render result using Coohom
Don’t be afraid to experiment—every render helps you improve your skills. Adjust the lighting, change materials, and test different presets until you achieve the perfect balance.
Conclusion
And there you have it—your guide to mastering 3D rendering in Coohom! By experimenting with camera angles, customizing lighting, and tweaking advanced settings, you'll be able to produce high-quality renders that elevate your designs.
Thanks for reading! Be sure to subscribe to my YouTube channel for more tutorials and tips, and don’t forget to sign up for my newsletter for the latest updates in interior design and 3D visualization. See you next time!
Written by Khireddine Z
Comments
Tutorial 08 – Finalizing Materials in Coohom
Pingback:
Comments are closed.